storage for my paper projects...come take a look!

31 December 2011

What the heck?

Where on earth have I been? I know I'm in good company in not blogging much during the holidays, but I haven't blogged AT ALL in weeks! I've missed my bloggy friends!

I've been inspired by some year-in-review project posts, so I think I'll do one of those soon. (See here and here for some inspiring cards from my craft pals!). I have also been keeping up with my Big Fun Christmas journal (see here and here for its humble beginnings), and I'll get some photos of that soon to share. 

For now, though, will you settle for a layout? Thanks!


This photo is from the wedding (duh) of a couple of sweet kids. I can say that they're "kids" because one of them is my husband's former student! We've become pals in the intervening years, and were honored to attend their wedding. Don't you love this photo of them? They're so cute.


I made excellent use of my ever-expanding washi tape collection here, creating a shiny/patterned/textured background for my title and caption. The paper collection is My Mind's Eye's very pretty Love Me, part of my long-neglected December kit from Scrappy Chic.


I fussy-cut some banner flags from my extra paper, popped them up on foam, highlighted the hearts with stickles, and then "strung" some twine all over the place (it's glued down, which was easier to do than I thought it would be). I think the swirly lines break up all the straight lines from the tape. In my head, anyway. Wanna see a secret?


More photos! I had a handful of not-great shots that still helped tell the story of the night, so instead of featuring them, I created a little accordion fold right in the middle of the layout. I'll definitely try this trick again!


I had some leftovers, so I combined them with that pretty plaid pattern from the same collection for a quick card. The stamped twill started out white, but I inked it up with some Distress Stain (spun sugar, from my stocking!) before stamping and adhering it. Stamps are from this Studio Calico/Hero Arts set, also sourced from Scrappy Chic.

Local folks, have you been up to the store since their big expansion/re-organization? I love it! So spacious-feeling and much better-lit. Can't wait to get up there for a crop!

Well, it's good to be back. I hope you all have a very happy and crafty 2012! Happy New Year!

05 December 2011

Sure could use a little...

...Peace, that is.

Man, is it busy around here! The usual holiday bustle, plus some non-holiday bustle, plus plenty of school bustle (the end-of-semester grading binge is officially underway).

So, for a moment, peace:


This was my "personal challenge" line from my Scrappy Chic kit - it's BoBunny and absolutely lovely, but also very busy and glittery...plus the kraft-brown-blue-snowflake combo was a bit perplexing. I tried to find some peace in all that busyness, and I'm pretty pleased with the result. The tree stamp above the title is the same one I used on the ornament in the photo (shall I call it craft continuity? I think I just created a new concept).


It's a little hard to see, but some of the trees have distress stickles on them -- the subtlest of all glitters, in my book. I love those letters -- they're from Pebbles and are perfectly matte.


I kept the busiest patterns to smaller accents, but the glitter definitely still stands out -- in a good way, though. A twine bow finishes it off.

Here's to peace. Have a lovely day!

01 December 2011

CHA mini album (finally!)

So, remember way back in July when I had such fun at CHA in Chicago? And I was all geeked about making a mini out of my photos? Well...sometimes time just slips away from us.

But! No longer! Here it is!

I started with a Maya Rd. chipboard binder that is kind of like this one, only a bit bigger. I got mine at Scrappy Chic (where they're having another yard sale this Sunday [buy my stuff! get great deals!]).

In honor of my favorite line from CHA, almost all the papers and embellishments are from the Amy Tangerine line by American Crafts. Still love it, by the way.

So, away we go! Click to enlarge any of the collages:
Cover: lots of misting, along with Amy Tangerine fabric paper, Thickers, tape, and accents, plus OA mini alphas. Tip: to use tape on top of fabric, just lay it down over some stronger adhesive. I used scor-tape, and it worked great!
Inside pages, part one: things we did.
Pages are misted, then layered with photos, tape, stickers, and other accents. I included my name badge, too.
Inside pages, part two: people we met. The last page is a photo of the city skyline as we were driving home.

I haven't really added any journaling. I might just throw in people's names or list events or something. Nothing too tricky -- after all, it took all these months just to make the thing!

Anyway, now it's December -- how did that happen? I'll be getting started on my Big Fun Christmas Project any moment now (I've been impatiently waiting!). Do you have any special holiday crafting plans (for yourself or for gifts?) Let me know!

Until then, I hope you have a lovely day!

28 November 2011

CFC29 = Super-Quick Holiday Cards!

Well hello there! I took a little blogging break for Thanksgiving (and the shopping, leftover-eating, and gutter-cleaning that followed), but today I'm back with a quick batch of holiday cards that just happen to use this week's CAS-ual Fridays sketch:


Clean and Simple, indeed. I grabbed some of my recent holiday acquisitions, as well as some stamps from the stash, and whipped up four cards in about twenty minutes!


When I'm pressed for time (or mojo), I don't fuss with the sketch -- I run with it! Here, the upper two cards use paper from the Simple Stories Christmas line (the 6x6 pad), while the bottom two use the same North Country collection from this post (but the 6x6 pad instead). All the papers came from Scrappy Chic (where else?).

Besides the top-right card, which uses a quick bit of stamping (an older SU set) and paper-piecing, I let the papers stand on their own and just stamped the sentiments (all from Papertrey Ink). It's a little hard to see, but I also pierced lines around the sentiments too.

Quick, easy -- and I can cross four more cards off the list. Hooray!

I'll see you again soon -- have a lovely day!

23 November 2011

Happy (almost) Thanksgiving!

Whether you're in the US or not, it's always nice to pause and think about all the good things to be thankful for. And if you ARE in the US, well...why not stuff yourself silly too? That's right, tomorrow is Thanksgiving here, and besides the thankfulness and all the great chow in store for me tomorrow, Thanksgiving is also prime crafting time.

For most big holidays, I make tags for my family. This year, I got all Tim Holtz-happy and broke out my underutilized TH embossing folders, along with about 5 different colors of Glimmer Mist, three styles of 7gypsies tape, and some Prima leaves to make these:


Ooh, pretty. :)


After the mist dried, I hit each tag with some Distress Ink (using one of the foam applicator thingies) to catch the highlights of the embossed designs.


All the ribbons were pulled sort of randomly from my stash -- I just picked fall-appropriate colors.


Those flowers look like the ubiquitous rolled-ribbon flowers, but I actually made them with strips of vintage pattern tissue - it works the same as ribbon, I just had to be a little more delicate as I twisted to keep the paper from tearing.  The stamps are from Waltzingmouse, and they're conveniently placed to disguise the seam in the embossing (my tags were bigger than my folders, so I flipped them around and embossed the bottom inch or so separately).


The back features my favorite tiny gnome (and an appropriate sentiment) from this Unity stamp set (their big sale ends today, in case you were looking to spend some dough). The papers on the back are all from We R Memory Keepers' Autumn Splendor collection.

Everything you see here (except the Waltzingmouse stamps) came from Scrappy Chic -- some recently, some from days past. Their big sale starts Friday, in case you were looking to spend some MORE dough (and at a locally-owned small business, natch).

I had fun getting all misty and inky and stuff making these, and I hope the fam digs them, too!

Time to get back to the oven -- one more dessert to go, and my contributions to the feast will be complete. Yum. I'll get photos, don't you worry.

Have a lovely day, and have a great Thanksgiving, wherever you may roam.

21 November 2011

Hip Holiday layouts

Ok, maybe these layouts aren't hip, but they do feature Hipstamatic photos...have I mentioned lately how much I love taking photos with that delightful little iphone app? It makes everything look festive/artsy/skillful without trying too hard at all. 

I wanted to scrap two very blurry photos of one of Andrew's choirs singing at last year's holiday concert. Here's an explanation of the event:


And here's the whole layout, using Prima's awesome and quirky holiday collection, North Country. It's very un-Prima, which is good for me -- as you know, floral girly stuff and I are not the best of friends (Look! Did you notice I used a flower right smack on this layout? I impressed myself with that one!). I ganked the layout design from a layout in this post, which was based on a layout from Shimelle's Pretty Paper Party class (whew!). Yes, "gank" is a word, though CASE would probably be a better option.


It's a little hard to see in the photos, but I layered some red tulle trim under the photo edges as well as under a Hambly transparency strip -- since tulle is so lightweight, it didn't add much bulk, even though it's all pleated and stuff. Ooh, and speaking of ganking, I totally ganked the title from the musical Mame:


Yet another song to get lodged in your brain. Enjoy. :)

One more layout today, this one featuring some Webster's Pages paper from the Botanical Christmas collection:


Kept it simple, since the Webster's paper is so pretty all on its own. I like that I unintentionally ended up with a visual triangle of trees, though :). My favorite part is the bow, which I made with some ribbon from my stash that I'd had forever:


The bow-y part is made the same way as the one on this card, only with a loop of ribbon instead, and then I just added the short tails behind and the long bit behind the pictures -- 4 separate pieces of ribbon come together so neatly, eh?


A little Stickles on the top of the tree, some alphas from Basic Grey and Studio Calico, and I called it a day! These layouts are out for the viewing at Scrappy Chic, if you're curious to see them in person. They have some great Black Friday (and Small Business Saturday) sales planned, so shop well!

Speaking of "calling it a day," today our second bathroom got torn apart (thanks Dad!) -- it's reno time. On top of that, I made mac and cheese for Thanksgiving, along with a batch of ice cream from this fabulous book -- seriously, this chick has her ice cream science down!! Oh, you know, plus I worked and stuff. Busy day!

Hope yours has been lovely! I'll be back (maybe) Wednesday with my family tags for Thanksgiving. Hooray!

19 November 2011

Christmas progress -- slowly but surely

Hi all -

Quick post today. First, a card using this week's CPS sketch:

When I'm stuck, design-wise, I love finding a sketch and just going with it. That's the case right now with me and Christmas cards -- I have plenty to make, but not a ton of inspiration (yet). So, here's what I did with the sketch:


Simple and faithful to the original. I used some Simple Stories 6x6 paper (from their 25 Days of Christmas collection) -- it's a prettier, warmer olive irl, but it's awfully grey around here, so the colors aren't the best.  The sentiment is from SU, and the two narrow panels behind it are embossed with some cheery snowflakes. Some white ink around the edges, and I can cross one card off my to-make list.

Before I go, I've added some pages to my Big Fun Christmas Project journal:


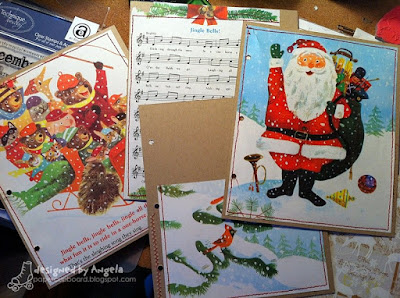
I took some of my favorite pages from the Little Golden Book I used as the cover and stitched them onto some kraft cs pages (first I folded up the bottoms and stitched them into pockets). I love how colorful the vintage images are!

That's about it for now -- back to your regularly scheduled Saturday. :)


16 November 2011

Cats and Dogs in October.

Hi there, and happy Wednesday! I have a three-layout post for you today, all featuring pets. What could be better? Oh, I know -- how about three great lines of paper from my October kit from Scrappy Chic?

On with the show:
You know, sometimes it's worth scrapping somewhat crappy pictures of yourself...as long as they feature a cute and distracting kitten! These are all self-portraits I took when Simon was just a baby. He was so much snugglier then...now his snuggle attention span is pretty dang short. Oh well. I've used a great line from Glitz Design -- definitely shabbier than I usually go, but I think the colors are just gorgeous. I inked my title alphas purple to match and threw in some Distress ink splats for good measure.


So, in case you were wondering, yes, we DO have two cats :). I already showed y'all this picture on an earlier post, but I just had to scrap it, too -- this still wins the prize for the most non-growl-inducing physical contact Dex and Simon have had. Plus, ain't it cute? Here I used Studio Calico's awesome Autumn Press collection (including those kraft butterfly stickers -- yummy), along with a bit of Amy Tangerine, some Maya Rd. tickets, plus doilies and burlap from my stash.

Look out below! It's not one, but TWO DOGS on a layout. You see, Andrew and I are definitely cat people (he'd like a dog someday...I think that particular someday is quite a way from now!), but my parents are definitely dog people. I grew up with dogs, I like dogs, and I know what a pain in the behind dogs can be (hence: cats).


Anyway, this cute photo of my mom and her dogs (Zeus and Roxy) just makes me smile. They're very good at waiting their turn for scraps. The paper line is Summer's End by Fancy Pants -- suitable, since the photo is from the end of August. The frames are pre-printed on the page, making embellishing quick work. Did some layering under the photo, gave some veneer butterflies a dose of ink (thanks for the tip, Liz), threw in a fussy-cut leaf from another sheet, and used the negative from the butterfly stickers on the previous layout along with some watercolors as an accent up at the top.

I have more from October's kit...plus what I've done so far with November's kit...plus some progress on my Big Fun Christmas Project, plus some holiday cards...So, yeah -- you'll be hearing from me again soon! In the meantime, local folks can check out these layouts and a bunch more over at Scrappy Chic. (Happy Shopping!)

Have a lovely day!

14 November 2011

Eight-in-one.

Hey y'all -- Happy Monday!

I have been on a layout tear of late, and I figured I'd try to catch up on some projects. The eight layouts below were all made just for me, just because. Some I made at a crop at Scrappy Chic; others I made after being inspired by my Pretty Paper Party class over at Shimelle Laine's website. Eight is a lot, so let's get on with it:


{a quick note: I realized for the first time that I can make photo collages right in Picnik -- and with a lot of options and control over proportions. Makes me happy! A click here will enlarge the whole thing.)

Clockwise from top left: 1. Photo/CHA; Paper/Authentique. 2. Photo/CHA; Paper/Kaisercraft. 3. Photo/CHA; Paper/Studio Calico, Echo Park, Dear Lizzy, Anna Griffin. 4. Photos/Detroit Jazz Fest. Paper/Crate Random.

Notes: 1. I love this photo of Chris and Katie on the escalator -- we were looking for a banquet, but we weren't finding it...yet. 2. The Paper Crafts people had copies of their then-newest issue -- the first time I had a card published! I totally snuck this photo :). 3. Holy pattern-combo, batman! I love the cluster of embellishments -- all of which were within arm's reach on my desk! 4. Holy photos, batman! I count nine. One of them might look familiar from this post, but this layout's all about the fireworks.

Next:
(The Picnik collage tool has a "wonkiness" control -- great for not-quite-straight on photos like these!)

Again from top-left: 1. (cute)Photos/our bedroom :); Paper/Prima, Studio Calico 2. Photo/our bedroom; Papers/Crate, Authentique, Grant Studio [mostly kit leftovers]. 3. Photo/our bedroom (see a pattern?); Paper/all scraps. 4. Photos/my aunt's backyard; Papers/My Mind's Eye (various lines), Crate.

Notes: 1. Holy cuteness, batman! I love these photos of Simon snuggling up next to Andrew's back - under the covers, no less! 2. Another snuggle -- this time from June, when Simon was just a little guy. 3. Oh, that photo -- this is definitely frame-worthy. I let it take center-stage on the layout because I love it soooo much. 4. This is CASEd from one of the class sketches -- I CASEd it again because I love it -- that layout will follow soon.

Patterns I can see in these eight layouts: Clearly, I like to scrap about Simon and Andrew! I also really like kraft. And grey. And I guess I'm not afraid of mixing patterns or paper lines. I also like doilies and mists quite a bit right now, though the mists don't always photograph clearly. Single-photo layouts come together most quickly for me, though I'm pretty proud of my two-, three- and NINE-photo layouts too! I've been intentional about layering more, and I think it's starting to stick. What do you see? Let me know.

Anyway, I hope this wasn't sensory overload for you! I know the details are sketchy -- if you'd like to know how something was done, or where my embellishments came from, etc., just ask in the comments.

Next up: catching up on Scrappy Chic layouts! See you soon -- have a lovely day!

11 November 2011

Friends with (bandwagon and stash-busting) Flair Friday!

Hey there -- happy Friday!

Since it's Friday, it must be Friends with Flair Friday over at Unity -- be sure to stop over and see today's great deal and all the other bloggers participating.

First, the card. Yes, I've finally joined the hexagon bandwagon. Have you noticed how they're popping up all over in the paper world? I can appreciate geometry and all, but I didn't have any hexagon punches or dies, and I wasn't really sure I wanted to invest dough in yet another bulky tool...and then I saw this tutorial over on the Cosmo Cricket blog using a quilter's template -- and about $5 later, I'm in business. Here I used the smallest size, but I can make hexagons up to 5.5" -- think of the scrapping possibilities! Anyway, take a peek:

I think this is the earliest I've ever gotten my Unity KoM! In celebration, I immediately got that cute cardinals-and-holly image inked up (with some markers), along with the pretty snowflake bg. To go along with it, I used a sentiment from the September kit. Close-up time!


The snowflakes are much clearer here, and you can see that I blasted the thing with some shimmer. Pretty! The "bow" is just some ribbon that I stuck in a brad before popping it through the card front. Easy!

Second, the stash-buster {Warning: there's no Unity in the rest of the post, so if you need to hop along, you won't hurt my feelings ;)}. All the hexagon papers up there are leftovers from my Big Fun Christmas Project this year -- a mini-album made entirely from my favorite holiday goodies, the papers and embellishments and other bits that I've saved hoarded over the years. I also have a vague memory of seeing someone make an album out of a Little Golden book, and I just couldn't resist it! {That idea is pre-Pinterest, so I no longer remember where I saw it. Does anyone else remember seeing such a thing in blogland? If so, let me know so I can give credit, eh? Thanks!}

Alrighty, then, here's the stash I've used:
Ooh, pretty! The top photo are the fronts, the bottom are the flip sides. I cut a couple dozen sheets down to about 6.5x7.5" to fit inside a Little Golden book I picked up at a used bookstore -- it's definitely one I remember owning, though, so that makes it funner :). I broke out my long-neglected Crop-a-Dile Big Bite to punch holes through the whole stack at once. Man, that made an exciting noise ;).

Here's how I turned the book into an album cover:
A little fancy box-cutter work, a pair of pliers (and then wirecutters) for staple removal, some Crop-a-dile work, and I was in business! Luckily, Little Golden books are very cheaply assembled, so it wasn't exactly hard work disassembling one. Here's the whole thing put together:
...and there's my messy grid pad underneath it ;). Since I did my initial assembly, I've added some extras -- envelopes, tags, etc. My favorite thing? With the exception of just a couple papers (namely the reindeer Hambly transparency and the Amy Tangerine fabric paper you can see up above [from Scrappy Chic, of course!]), everything else is at least a year old, and several papers go way, way back. I've kept them because I love them, but now I'm using what I love, and that's even better. I'll keep you posted as I add to the album (especially once I start adding photos!). I wish I could say it'll be a December Daily, but I'm not exactly that disciplined...so it'll probably just cover the whole season in bits and pieces, more Smash Book style, perhaps. I can't wait!

Anyway, thanks for hanging in there through a shockingly long post! Anyone else out there have a Big Fun Christmas Project planned? Let me know about it below.

Hop along, and enjoy your weekend!

09 November 2011

Looking up in Wonder.

Hey there, people! I mentioned last post that I've made a lot of stuff for Shimelle Laine's Pretty Paper Party class (which has been quite inspiring). Today's layout is inspired by all that fearless paper- and pattern-mixing that's part of the class, as well as Shimelle's sketch of the week, which just happens to be perfect for square photos...


...and it just so happens that I have a pile of square photos to scrap -- they just arrived last week from my first order at PostalPix, an iPhone app that allows one to order photos straight from the iPhone photo library (convenient!), AND they offer square prints, which is perfect for a Hipstamatic fiend like me (awesome!) If you're interested, the prices, quality, and speed of delivery are comparable to other developers I've used as well. 

Anyway, when I saw the GORGEOUS Head over Heels collection from Lily Bee, I knew it had to be part of my November Scrappy Chic kit, because I could see this photo in my head and knew it would be a great combo. (Note: y'all know I am NOT usually a floral-paper kind of girl, yet here I am! I think the class is working....). My goodness, shall we get on to the layout already? Ok!


Holy cats, is that a cute baby or what? I can brag since she isn't mine, right? Ha. I took this photo of my friend's daughter, Sahana, back in April, and it still gets me every time. Since she's looking up (in wonder), I bumped the photo block to the bottom of the layout, but left the title up there at the top to give her something to look at ;). The title work is my second-favorite part of the layout (besides the photo, of course!):


I laid down a bunch of strips of my latest washi tape acquisitions (from Hambly and Amy Tangerine - so yummy) before layering on my title (letters from Studio Calico, October Afternoon, and My Mind's Eye [the pretty fuzzy ones]). Love. My supplies (including my embellishments, which are from Pink Paislee, Kaisercraft, and Elle's Studio) are all from Scrappy Chic, and this layout will soon be there too, so keep an eye out, local folks!

Thanks for an inspiring sketch, Shimelle! For now, I have to get back to the real world, sadly -- in the meantime, have a lovely day!

07 November 2011

Paper Smooches SPARKS - November edition


Hey folks -- happy Monday!

I have so many things to show you -- somehow, when I should be doing fun things like grading and cleaning, I end up making stuff instead! Such a sacrifice, I know.

Anyway, today I thought I'd kick things off with a layout that's all about the stamping -- a rarity for me, actually, even though I'm as much a stamper as a scrapper. It seems like I have a hard time putting the two together, but when I saw the current Paper Smooches SPARKS challenge image, I had a flash of...something...maybe not exactly brilliance, but a flash nonetheless.

Here's the challenge image:
Yum - Orla Kiely. Love this design! Plus, since I won some Paper Smooches stamps from Emily's blog a couple weeks ago, I was all set to get 'em inky! I was inspired by the colors and the multi-directional repetition of the image, as well as the little signature in the selvedge. Here's my layout:


Holy stamping, Batman! I repeated the camera from Perpetual Bliss over and over (and over) again, adding the lens cap (at least that's what I think it is) in lighter and darker orange, plus some hearts in navy. Some Echo Park paper scraps form the crazy mat for my photo (Dots and Stripes Metropolitan and Candy Shoppe), and I added the sentiment several times in white(ish) on the navy bits to echo the signature on the fabric.


I turned one of the cameras into a little medallion accent to highlight the theme of the page: we often forget to get photos of ourselves, but I almost always love the ones we remember to take! This particular photo was from Jazz Fest back in September.

Well, I can't say I'll always stamp THIS much on my layouts, but I'm sure encouraged to break out the rubber and ink more often when I'm scrapping.

Coming up this week: I'll be sharing my October projects for Scrappy Chic, and if I'm really ambitious, I'll have a pile o'layouts inspired by Shimelle Laine's Pretty Paper Party class. Can't wait!

Now, back to the real world. Grading, here I come! Have a lovely day.

04 November 2011

Friends with (winning) flair!

Hi all, and happy Friday!

Be sure to head over and see what great deal Unity has for their Friday Feature -- it's always a good one. In the meantime, it's also Friends with Flair Friday, so how about a card?  Ok, then:


Aw, ain't it kinda sweet? Friends of ours just let us know that their first bundle of joy is on the way -- but it's kinda early, so they're keeping it on the DL for awhile. Still, I couldn't let the card-making opportunity slide by! This card also happens to fit right in with the Unity Kit of the Month sketch challenge for November (bonus!) -- I used stamps from April's KoM (the cutie-pie onesie, which I trimmed out and "hung" on some Twinery twine), and from February's KoM (the sentiment). Papers are from Echo Park's For the Record collection, which I still love to bits. So yummy. I die-cut and embossed my own tag, which gave me a chance to break out my ancient eyelets (bonus again!).

Before I go, I thought it was high time I posted the winner from my little giveaway -- out of a whopping four qualified and desirous entrants, here's the winner:


That'd be Lindsey! Congrats, Linds -- I'll be emailing you shortly.

Have a lovely weekend!

31 October 2011

Happy Halloween!

Hiya! Just thought I'd pop in really quickly to wish y'all a spooktacular Halloween!

We get plenty of trick or treaters in our neighborhood, so I'm all stocked up on the sugar. While I wait for the early birds to show up, I thought I'd share my sole contributions in the Halloween-card department this year:

(anyone notice anything odd about this photo?)

Sponge-tastic! I first masked and sponged the moon, and then the sky for each one -- a purple dusk on the left, a reddish dawn on the right (red in the morning's a sailor's warning, right? Or maybe it's "some reddish work done at night." Or maybe I've read The Crucible too many times.). I mixed ink brands on the left (SU, Distress, old PTI) -- it's moodier and (I think) eerily foggy-looking. The inks on the right are all SU, and they seem more serene and even-tempered. Yes, I assign character traits to my inks. Even when it isn't Halloween ;)

{An aside: I don't normally trumpet Tim Holtz's products...he's talented but perchance a tad overrated. However, the whole Distress line of inks makes me very happy (including the stickles and stains), and his ink applicator thingamabob really does make inking a breeze. Dang it. I get all of my TH goodies at Scrappy Chic, where the man has quite the following among customers. I guess they're on to something.}

Back to the cards: After inking like mad, I then stamped my little scenes using my very first stamp set from Waltzingmouse, Hocus Pocus. Those stamps inked like champs right out of the packaging, and they definitely pass the squish test. If there's one thing I hate, it's really well-designed stamps that are cheaply made -- they squish when you stamp 'em. Not these, though! I think I may need more....

Anywho, some paper from Echo Park and a bit of narrow velvet ribbon finish 'em off. Now, if only I'd remembered to send them to someone! Oh well, it'll be a belated Halloween this year!

Don't forget, you have until midnight tonight to enter my little giveaway in the post below this one. As of right now, there are a whopping four entrants, so I think your chances are mighty fine!!

Now, I'm off to scare the little munchkins with my spooooooky semicolon costume...but that's another post.

Have a lovely creepy day!

27 October 2011

Thanks -- and a thankful giveaway :)

Hi all!
I'm peeking out from under my mountain of essays just for a minute to share some thank-you cards I made a bit ago -- they've all reached their destinations now (the homes of my bloggy friends who sent me these birthday goodies).

First up, for my buddy Meg:


Meg was kind enough to send me my first Market Street Stamps, and I used the cane bg here, along with some gorgeous Crate paper (also from Meg!). Most of the rest of the supplies are PTI. Thanks again for all the goodies, sweet Meg!

Next up, for Lindsey:


Linds has a family member who is a big squirrel nut (pun. ha.), so I kinda ran with that theme here but kept true to Linds's CAS style, using an older squirrel stamp (Memory Box, maybe?) for the bg and another stamp from Meg for the gridded acorns (which are stamped on watercolor paper, btw -- hence the imperfect impression). The acorn caps and dies are PTI, and a bit of faux stitching finishes this one off. Thanks for the adorable snowman stamp, Linds -- I would've used it on the card, but I don't want to tempt the snow gods into sending some of the real stuff just yet ;)

Finally, for Emily:


Whoa, this is a big card. About 4x9, which makes it a you-know-what to get a good photo ;). I kind of went wild here, with a very busy bg (more paper from Meg -- one of my favoritest Pink Paislee lines), stamped-and-die-cut bikes (Em is a supreme fussy cutter, unlike me, so I go with dies!), and some ribbon and cs in coral, which she likes way more than I do! I also included a little twine bow made with the twine she sent along. You rock, Em!

Now, how about a little giveaway? I'm very thankful for all my regular (and irregular) blog readers, and I have some stamps that need a new home with one of you:


All three sets are new -- the Prima tree is brand-new, while the Sassafras stamps are older but unopened. If you think they should come and live in your house, drop me a line in the comments below. You could tell me about your Halloween costume, your holiday crafting plans, the weather, your kids...anything at all. Can't wait to hear from you! Everyone who comments by the end of Halloween (that's Monday, 10/31, at 11:59 EST) will be entered to win. Who knows? A few other goodies just might find their way into the envelope, too :) Enjoy!

Have a lovely day.